Update: Paul B mentioned the "Merge to HDR" in Photoshop. For some odd reason, I'd forgotten about that capability. Maybe because I did not think it would work with hand-held images (Helicon for depth-of-field can't handle them). It was not a very intuitive function, but after reading MR's introduction, I managed a first result (see below) which is good, in fact much faster and better than what I had done by hand. This is with the "equalize histogram" setting. Oddly, both this option and the otherwise promising "local adaption" option gives me much paler images than what the preview shows while adjusting the filter, rather impractical.
Also mentioned is Photomatix Pro, specialized software for this purpose, I am trying it. It seems though, like Gary hinted, that this software is not very good at combining hand-held images, which makes it at bit pricey at $99, when Photoshop can do a pretty good job alone at HDR, and better at merging (so you don't have ghost details).
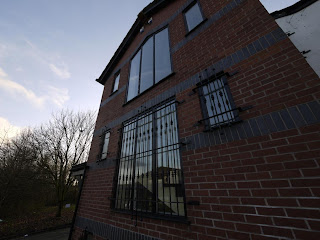
The underexposed in the bracketing set:

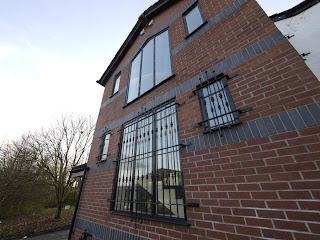
The overexposed:

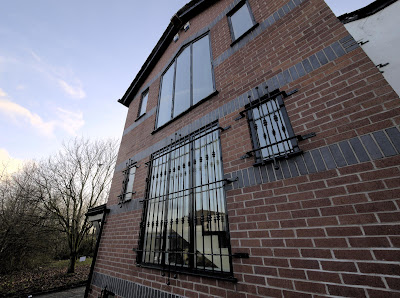
And the Photoshop-combined picture:

The Panasonic G1 (and GF1) has 2/3 stop as the maximum difference in exposure between bracketed shots, which I think is too little.
-------------------------
The BW Portrait contest is still open. If you don't have a handy model, use yourself, a few entrants have already done so with good results.
18 comments:
Off-topic, more or LEDs: although I haven't sent in anything, I do think setting up this contest was a good idea: so you're giving everybody the chance to earn 100 bucks by creating a good picture. Will you keep up the idea? I might participate at a later time.
It's "more or less", of course. Sorry I didn't check my writing programme...
Eolake, if you have Photoshop CS4, have you tried the 'Merge to HDR' facility?
Thanks, Paul, I'd forgotten about that. I know Helicon has the same problems I have if the camera was not on a tripod, we'll see about PS.
MB: I like the the "more or LEDs" actually! I think I'll steal it.
We'll see how the contest goes, might be fun.
"I tried to combine two exposures, to get more of the blue sky. But I found it tricky, because the camera had moved slightly between exposures, so I could not get the two pictures to fit exactly over each other in layers in Photoshop, making masking difficult. Does anybody know helpful tips on this?"
THere IS an application out there somewhere, as a stand-alone or plug-in that will do precisely this for you automatically (though it's actually designed to combine exposures that may have areas of exteme contrast, to produce a more useable final image)
Good news? It was very cheap!
Bad news? ... grey matter not working too well yet, far too early in the day(!) so I can neither remember the name, nor find it myself just yet!:-)
Well, first result with Merge to HDR' was not good! Not only could it not fit the images right, but the contrast curve was *worse* than any of the individual images, it did not contain any of the highlight detail that the lowest exposure did, and less of the shadow detail too. What the hell is that about.
aha... what it displays of an HDR file is just the middle range... now how to export it...
I must say, not a very intuitive feature.
...Also the placement-of-detail merging is better, I got confused by some reflections... Seems I'm being rather premature here...
This may be the HDR software that *Phillocalist* mentioned. http://www.hdrsoft.com/
IMO, it has a much better Tone Mapping module than PS. It also sports a fine image alignment tool and can create a pseudo HDR from one exposure.
HDR work really should be done with a tripod, although them seem to go against the spirit of a light walk-around camera. The answer may be the Golliapod by Jobi. http://joby.com/gorillapod/slr/
Light and easy to have in a pocket and can get a solid grip on almost anything.
The 2/3 stop limit on the camera seems a bit thin, but if it allows more than 3 exposures in the bracketing you should be fine. If you get a total range in camera of 5 stops you should be fine.
Eolake, you are right regarding the Panasonic G1 and GF1 utilizing only 2/3 stop AEB. A very unfortunate choice, on their part. However, in moderately contrasty light you can opt for Panasonic's three shot bracket and utilize the last two of the three for a 1-1/3 stop separation. I handhold most all my HDR brackets and utilize Photomerge within Photoshop to align the images. Choose Auto under the Layout options and uncheck Blend Images Together. This derives a single image file with two layers, in this case. Save this as two separate image files (one for each of the layers), then utilize your HDR software of choice. Photomatix Pro, in my case.
Thanks for info, Steve and Gary.
Steve, the Panasonics let you choose between 1/3 and 2/3 stop, and between 3 exposures and 5 exposures.
Photomerge in PS, yes, that's another one I'd forgotten about. Very smart technology.
But I must say, I just tried it now: the masking is a bit crude isn't it? Tack-sharp edges on the masks. Admittedly I provoked it by combining three handheld shots with low depth of field.
Gary, it seems Photomatix Pro has a Merge Images (by feature) also... is this not as effective as the one in Photoshop?
Hello all.
I use the following technique in Photoshop, and have produced a number of large (20x24 inch) images using it.
Let me know how it works for you.
---------
If you have an image where you have a really bright sky and/or a really dark foreground, do this in Photoshop:
•Duplicate image to a second layer.
•Image->Adjustments->Desaturate second layer. (Make it black and white.)
•Image->Adjustments->Invert second layer. (Make it a negative.)
•Do a 64 pixel Gaussian blur on the second layer. (Low pass filter. Prevents loss of high frequency contrast on surfaces.)
•Set the second layer to soft light.
Bright portions of the image become darker, and dark portions of the image become lighter.
PS:
Use a larger radius, like 128 on the Gaussian blur if your images are very high resolution, and you see light halos around certain visual elements in the image.
PPS:
This also works great for fixing up flash photography images. Kills the highlights, brightens up the background.
Photomerge has a much more aggressive alignment engine than does Photomatix unfortunately. It would otherwise be nice to simply allow Photomatix to do both chores.
Photomerge enlarges the canvass to accommodate all combined images to be aligned free of cropping. Nicely, cropping is then a user decision after the merging is achieved.
Again, do not forget to uncheck the Blend Images Together box.
I just want RCMEDIA to know that I tried out his technique and found it a very good solution. Thanks.
Yes, there's a similar solution for combining exposures, using the negative layer as a mask.
Thanks Gary - I appreciate the feedback.
Along that line - it's also worth experimenting with different degrees of the Gaussian Blur, as well as increasing the saturation of the original image and then processing it.
Gives neat results with a duotone, as well as a posterized option.
Also - look at the difference in results between using SOFTLIGHT and OVERLAY.
Post a Comment